Since becoming a vegetarian, I have been sad that I can't eat my Sausage Spaghetti anymore. I finally took the time to create a version that I really like that is completely gouty vegetarian! The cauliflower gives it bulk like hamburger or sausage, it picks up the flavors of the seasonings, and it adds veggies to the dish. Give it a try. It's not exactly the same as my other spaghetti sauce, but it's close enough for me!
Kristin's Gouty Vegetarian Spaghetti Sauce
1 head cauliflower
1 medium onion, diced
1 green pepper, deseeded and diced
48 oz tomato sauce (six 8 oz cans)
Garlic salt
Black pepper
1 tsp crushed red pepper
1 T dry fennel seed
1/2 T Italian seasoning
2 cubes vegetable bouillon
1 to 2 lbs dry or fresh spaghetti
Olive or vegetable oil
In a food processor, grate the cauliflower. In a large pot, add a little olive oil and begin sauteeing the onion and green pepper along with the crushed red pepper and fennel seed. Once sauteed, remove from pot temporarily. Add a little oil again and begin browning the cauliflower as if you were browning hamburger. Once it has good color and is tender, add the onions and peppers back in. Add the tomato sauce and vegetable bouillon cubes; stir well. Add garlic salt and black pepper. I have no idea how much garlic salt and black pepper - enough to where you like the flavor. Taste and season as needed.
In another pot, begin cooking enough spaghetti for those eating - 1 to 2 lbs - according to package directions. I always add a little olive or vegetable oil to keep it from sticking once it's drained. Once pasta is finished cooking, drain well and return to pot. At the top of the sauce that is in the other pot, some of the liquid portion of the sauce will have risen to the top of the top. Carefully ladle that portion (about 3 ladles full) into the drained pasta. Stir/toss pasta well to coat all sides.
Serve pasta in a large bowl with sauce separately in another, along with yummy garlic bread and green salad. Yum!!
P.S. I like to add a good dollop of sour cream to the center of my plate once it's dished up. I stir it in and it makes my sauce kind of like a bolognese - creamy and all. Yummy!

Showing posts with label All Recipes. Show all posts
Showing posts with label All Recipes. Show all posts
Monday, May 19, 2014
Sunday, January 13, 2013
Gout Girl's Vegetarian Zuppa Toscano Soup Recipe
One of my favorite foods to eat when we go to Olive Garden is their Zuppa Toscano soup. I LOVE the sausage and the kale along with a very slightly creamy base. It is just sooooooo good! Well, this gout crap has made it so I can't really eat that anymore because of the sausage and bacon in it. However...I have come up with an alternative that I love almost just as much as the original. (Who can take the sausage out of anything and say the new version is just as good as the original? Nobody!)
So, here is my Gout Girl vegetarian version of Olive Garden's Zuppa Toscano Soup!
1-1/2 large diced red or yellow onions
2 t minced garlic
2 quarts KITCHEN BASICS unsalted Vegetable Stock
6 large potatoes - cut in half lengthwise and then sliced no thicker than 1/4"
1-1/2 t crushed red pepper
1 T fennel seed
1 T kosher salt
1 c heavy cream
1 bunch of kale, torn into pieces without stalks
Saute the onions in a little bit of oil (1 T) until the onions are soft. Add the garlic. Saute for one minute. Pour in vegetable stock, crushed red peppers, and fennel seed. Bring to a boil. Add potatoes and salt and cook until soft - approximately 15-30 minutes, depending on thickness of potato slices. Add heavy cream and cook until thoroughly heated. Stir in kale. Cook for 3-5 more minutes. Enjoy!

The color is much darker than the regular Zuppa Toscano because of the tomato base in the stock, but it tastes really good. I have tried other brands of vegetable stock/broth, and trust me, use this one.

Thursday, November 8, 2012
Gouty Sauerkraut
One of the things I've read about dealing with gout is to eat sauerkraut. My mom used to make the best sauerkraut. I loved it. Well, since I can't have the pork in it anymore, it's not quite the same, but it was still good. Here's how we make it...
First, start by peeling and cubing some russet potatoes...


First, start by peeling and cubing some russet potatoes...

add some salt and water and boil them until tender.

Open the bottle of sauerkraut and dump it in a pot.

Set the bottle aside for now. Add some water to the kraut. The less water you add, the more sour it will be.

Let the sauerkraut boil for about 15 minutes. Then, add equal parts cold water and flour in the jar. Put the lid on and shake the heck out of it.

It should be thick but creamy. Not too thick, not runny.

Pour it into the boiling kraut and stir with a wisk until thickened.

Add salt and pepper to taste. Stir well.

Turn off the heat and let it rest.

Drain the potatoes

Dish up some potatoes and then spoon some sauerkraut over them. Enjoy!

Sunday, October 14, 2012
Green Onion Green Chile Rice
So, learning to cook vegetarian style has been quite the little feat. Every recipe is new to me and I don't really know how much something will make. Sometimes I can gauge by how big of a pan it says to cook or bake it in, but not always. This is one of those things. But...I've made this three times now and it doesn't matter to me that it makes an 8x10 dish. I love it. And, I will eat it for days because it's so good.
I found this recipe and picture on Kalyn's Kitchen - where you're bound to see me pulling a ton of recipes from as I go through this gout crap. But, almost every single recipe I've tried from her website has been phenomenal. If not, I don't post it here. I have made a couple alterations to this recipe to make it even more to my liking...no biggie, I suppose, since she does the same thing to recipes she finds and then reposts.
Everyone who knows me knows I really don't like using my crockpot all that much, but Kalyn suggests using the crockpot for this one. Either way would be great so I'll post both ways.

GREEN ONION GREEN CHILE RICE
Ingredients:
5 cups cooked white rice (I love Minute Rice, so that's what I use, but you can use regular white rice if you want)
2 cups thinly sliced green onions - SERIOUSLY - DON'T SKIMP ON THIS
1-1/2 cups sour cream
2 cans sliced mushrooms, drained
1 can (7 oz) Ortega diced green chiles plus juice
2 T Green Tabasco Sauce
2 cups + 1/2 cup grated Mozzarella cheese (not the pre-grated kind)
2 T + 2 T finely grated Parmesan cheese
Mix together the cooked rice and sliced green onions in a bowl that will hold all of the ingredients. Add in the sour cream, diced green chiles and juice, Green Tabasco Sauce, the 2 cups grated mozzarella cheese, and finally the 2T parmesan cheese. Mix all of the ingredients together gently until well combined.
Spray a 3-4 quart slow cooker or 8x10 baking dish with non-stick spray or olive oil. Add the rice mixture to the crock pot or baking dish and press down so it's evenly distributed. Sprinkle the top with the rest of the grated Mozzarella cheese and the Parmesan cheese. If using the crock pot, cook on low for 1-2 hours, or until the rice is bubbling hot, cheese is melted, and it's starting to brown around the edges. If baking in the oven, bake on 350* until rice is bubbling hot and it's just starting to brown around the edges.
Enjoy!
I found this recipe and picture on Kalyn's Kitchen - where you're bound to see me pulling a ton of recipes from as I go through this gout crap. But, almost every single recipe I've tried from her website has been phenomenal. If not, I don't post it here. I have made a couple alterations to this recipe to make it even more to my liking...no biggie, I suppose, since she does the same thing to recipes she finds and then reposts.
Everyone who knows me knows I really don't like using my crockpot all that much, but Kalyn suggests using the crockpot for this one. Either way would be great so I'll post both ways.

GREEN ONION GREEN CHILE RICE
Ingredients:
5 cups cooked white rice (I love Minute Rice, so that's what I use, but you can use regular white rice if you want)
2 cups thinly sliced green onions - SERIOUSLY - DON'T SKIMP ON THIS
1-1/2 cups sour cream
2 cans sliced mushrooms, drained
1 can (7 oz) Ortega diced green chiles plus juice
2 T Green Tabasco Sauce
2 cups + 1/2 cup grated Mozzarella cheese (not the pre-grated kind)
2 T + 2 T finely grated Parmesan cheese
Mix together the cooked rice and sliced green onions in a bowl that will hold all of the ingredients. Add in the sour cream, diced green chiles and juice, Green Tabasco Sauce, the 2 cups grated mozzarella cheese, and finally the 2T parmesan cheese. Mix all of the ingredients together gently until well combined.
Spray a 3-4 quart slow cooker or 8x10 baking dish with non-stick spray or olive oil. Add the rice mixture to the crock pot or baking dish and press down so it's evenly distributed. Sprinkle the top with the rest of the grated Mozzarella cheese and the Parmesan cheese. If using the crock pot, cook on low for 1-2 hours, or until the rice is bubbling hot, cheese is melted, and it's starting to brown around the edges. If baking in the oven, bake on 350* until rice is bubbling hot and it's just starting to brown around the edges.
Enjoy!
Saturday, July 7, 2012
Nan's Pineapple & Mandarin Delight Cake
I just realized that I never posted the recipe for the cake from the Laurel Shower. It is SO good. It is a huge hit at work every time Nan brings it. I am so glad she shared the recipe with me!
Nan's Pineapple & Mandarin Delight Cake
Cake
1 cup canola oil
4 eggs
1 box yellow cake mix
1 15 oz can mandarin oranges
Beat eggs and oil with mixer. Add cake mix. Crush mandarin oranges into small bits and add to mix along with juice. Bake in 9x13 pan at 350 degrees for 25-35 minutes or until center is done. Let cool.
Frosting
1 8 oz container Cool Whip
1 small box instant vanilla pudding....sugar free or regular is fine
1 large can Crushed Pineapple
Combine Crushed Pineapple, including juice, with instant pudding until blended. Fold in Cool Whip. Spread on cooled cake. Top with 1/2 bag of flaked coconut (optional). Cool at least 3 hours to allow for flavors to blend. Best if served cold.
Nan's Pineapple & Mandarin Delight Cake
Cake
1 cup canola oil
4 eggs
1 box yellow cake mix
1 15 oz can mandarin oranges
Beat eggs and oil with mixer. Add cake mix. Crush mandarin oranges into small bits and add to mix along with juice. Bake in 9x13 pan at 350 degrees for 25-35 minutes or until center is done. Let cool.
Frosting
1 8 oz container Cool Whip
1 small box instant vanilla pudding....sugar free or regular is fine
1 large can Crushed Pineapple
Combine Crushed Pineapple, including juice, with instant pudding until blended. Fold in Cool Whip. Spread on cooled cake. Top with 1/2 bag of flaked coconut (optional). Cool at least 3 hours to allow for flavors to blend. Best if served cold.
Sunday, April 22, 2012
Carne Asada a la Fatty Girl
On Friday night, I stopped in at the new Winco. Oh. My. Freakin'. Heck. Talk about mostly awesome prices and lots of things to unnecessarily spend money on! The bulk foods section - I could spend 4 hours there easy. About halfway through the store, a slight anxiety/panic attack set it and I decided I was done for the night. Any who...I digress.
So, I'm wandering through the meat section and they have BIG packages of carne asada meat. By big, I'm talking 3-4 pound range...for $11. I thought that was awesome, so I bought a 3.5 pound package. Today, after church, I made my homemade fresh salsa, let it sit and congeal, and then began making my own carne asada recipe. All of the recipes I'd searched out in the internet had too much "stuff" in them. I was sure it didn't need all that. And ya know...it didn't. It was perfect the way it was.
So, this is how I made it.
3.5 pounds carne asada meat, diced into small pieces
2-3 limes, halved
3 heaping tablespoons of my fresh salsa
1/4 c finely diced onion - yellow or red
1/4 bunch cilantro, chopped
1 jalapeno, finely diced
Meat tenderizer seasoning
Tex-Mex seasoning or Carne Asada seasoning
Salt
Pepper
I wasn't good at taking pictures of this process because I wasn't sure how it was going to turn out, so my pics are kind of lacking. Go with it. You'll get the idea.
So, first, I diced the meat. It came pre-sliced, so I just sliced it again and then diced those slices into dices. I then plopped those into a bowl and squeezed the juice of the limes over the meat. Then, I added the diced onion, the chopped cilantro, and the finely diced jalapeno. I mixed that all up really well and then added the seasonings. Sorry, can't tell ya how much, just put on what you normally would for this amount of meat. Mix/stir/toss it all up really well, then dump in the 3 heaping tablespoons (those are the big spoons in your eating utensil drawer, not the measuring tablespoons, although one would hope that they equal the same!) of salsa. Mix well again. Let it sit for a few minutes.
In the meantime, get a big, deep skillet nice and hot. You don't need oil for this baby. Just warm 'er up nice and hot. Then after about 10 minutes of heatin' and marinatin', dump that meat into that hot skillet/deep pan and let 'er rip. Brown that goodness up. It will form it's own juices, so no need to add oil or water or broth or anything.


While you're letting it simmer, grab a couple cans of Diet Pepsi and chill for a bit. Once the meat is nice and tender, turn it off. Let it sit for about 10 minutes so it cools down just a little and soaks in some of the juice. Then, grab those nice big fresh tortillas that you bought at the mexican food place (What? You didn't know to do that? Oh well, make some of your own!) and put a big spoonful of meat and sour cream into the center of the tortilla and roll 'er up into a burrito. If you feel like it, put another spoonful of fresh salsa on the burrito before you roll it up.
It was all a somewhat surreal moment...it was like Riva in my house, makin' me burritos. So yummy!
So, I'm wandering through the meat section and they have BIG packages of carne asada meat. By big, I'm talking 3-4 pound range...for $11. I thought that was awesome, so I bought a 3.5 pound package. Today, after church, I made my homemade fresh salsa, let it sit and congeal, and then began making my own carne asada recipe. All of the recipes I'd searched out in the internet had too much "stuff" in them. I was sure it didn't need all that. And ya know...it didn't. It was perfect the way it was.
So, this is how I made it.
3.5 pounds carne asada meat, diced into small pieces
2-3 limes, halved
3 heaping tablespoons of my fresh salsa
1/4 c finely diced onion - yellow or red
1/4 bunch cilantro, chopped
1 jalapeno, finely diced
Meat tenderizer seasoning
Tex-Mex seasoning or Carne Asada seasoning
Salt
Pepper
I wasn't good at taking pictures of this process because I wasn't sure how it was going to turn out, so my pics are kind of lacking. Go with it. You'll get the idea.
So, first, I diced the meat. It came pre-sliced, so I just sliced it again and then diced those slices into dices. I then plopped those into a bowl and squeezed the juice of the limes over the meat. Then, I added the diced onion, the chopped cilantro, and the finely diced jalapeno. I mixed that all up really well and then added the seasonings. Sorry, can't tell ya how much, just put on what you normally would for this amount of meat. Mix/stir/toss it all up really well, then dump in the 3 heaping tablespoons (those are the big spoons in your eating utensil drawer, not the measuring tablespoons, although one would hope that they equal the same!) of salsa. Mix well again. Let it sit for a few minutes.
In the meantime, get a big, deep skillet nice and hot. You don't need oil for this baby. Just warm 'er up nice and hot. Then after about 10 minutes of heatin' and marinatin', dump that meat into that hot skillet/deep pan and let 'er rip. Brown that goodness up. It will form it's own juices, so no need to add oil or water or broth or anything.


While you're letting it simmer, grab a couple cans of Diet Pepsi and chill for a bit. Once the meat is nice and tender, turn it off. Let it sit for about 10 minutes so it cools down just a little and soaks in some of the juice. Then, grab those nice big fresh tortillas that you bought at the mexican food place (What? You didn't know to do that? Oh well, make some of your own!) and put a big spoonful of meat and sour cream into the center of the tortilla and roll 'er up into a burrito. If you feel like it, put another spoonful of fresh salsa on the burrito before you roll it up.
It was all a somewhat surreal moment...it was like Riva in my house, makin' me burritos. So yummy!
Saturday, February 4, 2012
Sausage Gravy and Biscuits
My Melon Man makes THE FREAKINEST BESTEST EVER sausage biscuits and gravy - FROM SCRATCH. Well...okay, the biscuits aren't from scratch, but the gravy is. We could make the biscuits too, but why? Pillsbury does a great job at those, so that's what we use.
Every time Melon Man makes the sausage gravy, I want to watch and learn, but then I'm like...why? If only he knows how to do it, then I won't have to do it! Well, even though I felt like yuck today, he made me sit there on a stool and document how to do it finally. I don't know if it was that the gravy was super good today because it just was or if it was super good because I'd hardly eaten anything for the last 4 or 5 days. Either way, I don't care - it was just SUPER DUPER AWESOME GOOD.
So...here it is...the pictures and documentation for Melon Man's Sausage Gravy...
Start by browning 1 pound sausage. He usually buys the kind in the tube. I think it's just normal sausage. Definitely DON'T get the maple one. Yuck. However, it you want it super sausagey, use 2 pounds.

While the sausage is browning, get out your bucket of flour, your seasoned salt, and your crushed red pepper. Pay no attention to the dirty dishes in the background...

Keep letting the sausage brown. Break it up into chunks. Don't make the pieces minuscule, but rather about the size of a dime. You'll be glad you did. Just trust me.

Once the sausage is browned, there should be very little grease in the pan. Just leave it there. You'll be glad you did. Just trust me again. Now, sprinkle in some flour.

Okay, sprinkle in more flour. You want it to coat the sausage well. Stir it up really good.

If you need to, add more flour. I don't know how to describe how much flour...just put enough to make it kind of thick-ish and soak up any remaining grease. Yeah, this needed a little more.

Okay, he thinks that looks good now.

Now pour in some milk. Just regular ol' milk is good. We use 1% in our house. It works fine. Now...how much milk...I don't know. This is my big deep skillet - about 12-14 inches across and about 3 inches deep. He filled it up about 1/2 to 2/3 of the way with milk.

Now add a bunch of seasoned salt. Yeah, again, not sure how much, but you can see he added the right amount...like always.

Now sprinkle in the crushed pepper. Okay...so for you spice wimps out there...ya gotta have SOME crushed red pepper. But, if you really want it to taste GOOD, put a decent amount in. The picture below shows the seasoned salt AND the crushed red pepper, just so you know.

Now, stir it all up. Just keep stirring, just keep stirring...it will start to thicken.

Once it's all thick and your biscuits (homemade or out of a pop-tube) are done baking, pour that luscious gravy over the biscuits and chow down. YUM-O-LA.
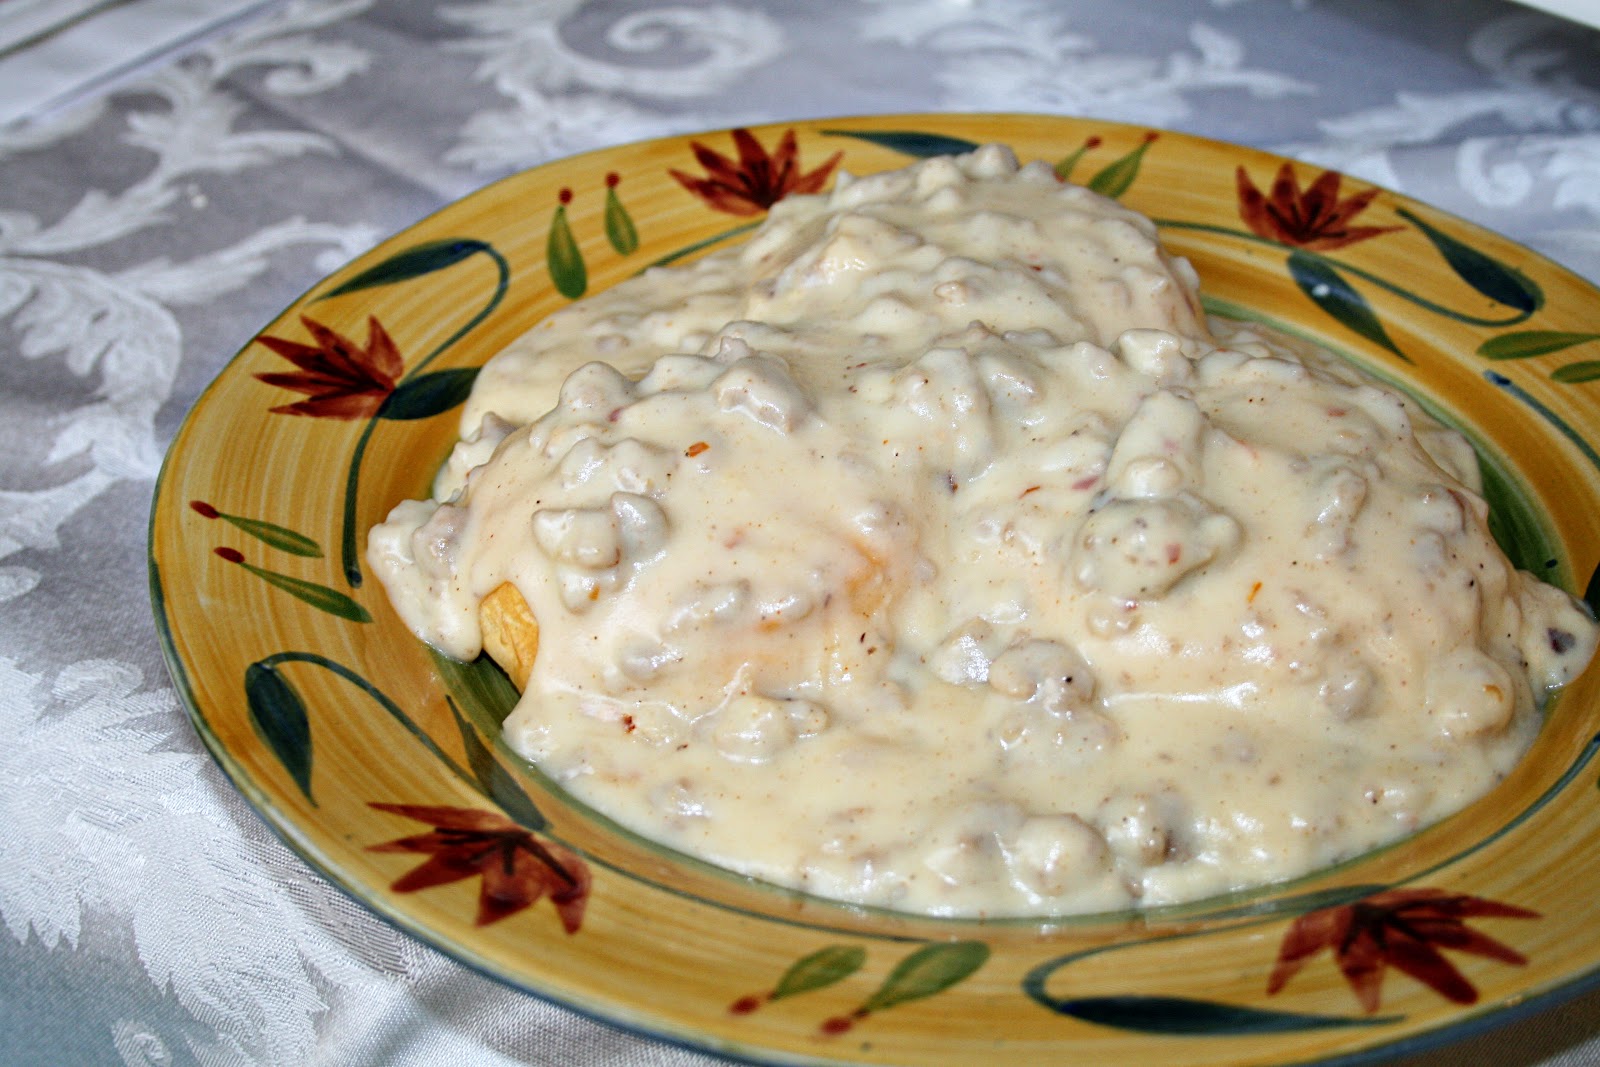
As you can see, we only used 1 pound of sausage and this picture shows that there was plenty of sausage, so one pound is likely fine. Enjoy!
Friday, December 23, 2011
Christmas Eve Eve
Today was cleaning day. Holly started around 9:15 or so and I took her home around 1:15. Always nice to have the dog hair and dust gone!
I dropped the Secret Santa gifts off at the Bishop's house on the way home and spent some time visiting with their family. Then, it was back home to stay on schedule. I thought about it today...during the month of December, I always keep a notebook of each day during the month and what has to happen on which days in order to make everything work (ward Christmas party, work, Christmas Eve, shopping, shipping, present making/buying, etc.). Then, as we approach Christmas Eve, the 24-48 hour countdown begins and things go from a daily basis to an hourly basis. As it stands now, I know what time I'll be out the door in the morning to go buy the meats for our Christmas Eve dinner, what time I'll pick up the bread, what time I'll shower, and what time we'll eat, along with a host of other "what time"s there will need to be to make it all go off okay. That's just the kind of freak I am - but it helps keep me on task and on schedule so I'm not exasperated when everyone gets here.
Over the years, I've also learned to make my Clam Chowder in the mid-afternoon rather than when folks are about to arrive or after they've arrived. It just works out better that way. People aren't sitting around waiting to eat, there is no stress of trying to hurry it along, and it actually cools down just enough that it thickens up nicely and doesn't burn your tongue when you attempt to eat it. Sure, I keep it hot enough that it's still safe, but this way works out so much better for me. I remember growing up, we ate so late because Mom usually had to work on Christmas Eve and then come home and make dinner. Even now, I think my family still eats quite late sometimes. We usually eat around 5:30 or 6 p.m. and that works for me.
So, after I dropped off the gifts, I came home and worked on cleaning off the kitchen table so I could set it. And...I made 6 dozen "suicide" cookies for Melon Man to take to work tonight to share. They are SO good. Here's the recipe......
MELON MAN'S SUICIDE COOKIES
1 c margarine or butter
1/2 c sugar
3/4 c brown sugar
1 egg
2 t vanilla
1 t baking soda
1/2 t salt
2 c unsifted flour
1-1/3 c assorted chips (chocolate, mint chocolate, peanut butter, butterscotch, peppermint, toffee, white chocolate - you choose what chips you want - we like these, except maybe the peanut butter)
 Blend the margarine and sugars together until creamy. Add vanilla and egg; beat well. Add dry ingredients to creamed mixture. Mix well. Add chips. Mix well.
 Using a 1-1/4 inch round scoop (ice cream scoop, melon baller, whatever), spoon dough onto ungreased cookie sheets, 2 inches apart. Bake at 375* for 8-10 minutes. Makes approximately 3-1/2 dozen cookies.


 You can tell from this picture that this recipe is well used. These cookies taste SO good. The combination of flavors is incredible!
 Melon Man was happy when he woke up that the cookies were done and he could take them to share with his friends at work.
I can't believe tomorrow is Christmas Eve. Where has the time gone? I just barely got the tree decorated and the ladder taken out to the garage today!
I dropped the Secret Santa gifts off at the Bishop's house on the way home and spent some time visiting with their family. Then, it was back home to stay on schedule. I thought about it today...during the month of December, I always keep a notebook of each day during the month and what has to happen on which days in order to make everything work (ward Christmas party, work, Christmas Eve, shopping, shipping, present making/buying, etc.). Then, as we approach Christmas Eve, the 24-48 hour countdown begins and things go from a daily basis to an hourly basis. As it stands now, I know what time I'll be out the door in the morning to go buy the meats for our Christmas Eve dinner, what time I'll pick up the bread, what time I'll shower, and what time we'll eat, along with a host of other "what time"s there will need to be to make it all go off okay. That's just the kind of freak I am - but it helps keep me on task and on schedule so I'm not exasperated when everyone gets here.
Over the years, I've also learned to make my Clam Chowder in the mid-afternoon rather than when folks are about to arrive or after they've arrived. It just works out better that way. People aren't sitting around waiting to eat, there is no stress of trying to hurry it along, and it actually cools down just enough that it thickens up nicely and doesn't burn your tongue when you attempt to eat it. Sure, I keep it hot enough that it's still safe, but this way works out so much better for me. I remember growing up, we ate so late because Mom usually had to work on Christmas Eve and then come home and make dinner. Even now, I think my family still eats quite late sometimes. We usually eat around 5:30 or 6 p.m. and that works for me.
So, after I dropped off the gifts, I came home and worked on cleaning off the kitchen table so I could set it. And...I made 6 dozen "suicide" cookies for Melon Man to take to work tonight to share. They are SO good. Here's the recipe......
MELON MAN'S SUICIDE COOKIES
1 c margarine or butter
1/2 c sugar
3/4 c brown sugar
1 egg
2 t vanilla
1 t baking soda
1/2 t salt
2 c unsifted flour
1-1/3 c assorted chips (chocolate, mint chocolate, peanut butter, butterscotch, peppermint, toffee, white chocolate - you choose what chips you want - we like these, except maybe the peanut butter)


I can't believe tomorrow is Christmas Eve. Where has the time gone? I just barely got the tree decorated and the ladder taken out to the garage today!
Wednesday, October 12, 2011
Tacos and Tortillas Night
Tonight we had Mutual at our house. I've been feeling the need to teach the girls skills that they will need as they grow up and move out on their own - life skills, etc. Yes, we teach them of gospel principles and such as church, but these mid-week activities are perfect for teaching them the skills they will need as they progress through life.
Tonight we made tacos and tortillas...our family fried tacos and homemade flour tortillas. The girls did a good job. They were a little slow - I think because they were talking so much - but we eventually got it done. Three of my girls came tonight - we missed the other two. Not sure why they didn't come, but, it's their choice.
We started off the night by making the flour tortilla dough. We made a bowl of dough for each of the girls. They would be able to make 8-10 tortillas each.
The recipe is very easy:
HOMEMADE FLOUR TORTILLAS
3-1/2 c flour
1 t salt
1/2 t baking powder
7 T shortening or lard
1 to 1-1/4 c very hot water
Put the flour, salt, and baking powder in a bowl. Add the shortening/lard and cut it into the flour mixture with a pastry cutter. Once the shortening is well cut in and the flour is mixed in to the size of extremely small peas, add the very hot water. Mix and then knead the dough for 3 minutes. If the dough is too dry, add a little more water. You want a nice moist, but squishy dough. Put it in the bowl, cover it, and then let it rest for 15 minutes. (additional instructions at end of blog entry)
After we were done making the tortilla dough, we began dicing, slicing, and browning for the tacos. Sammy helped by grating the cheese for us with the salad shooter. Everyone thought that was pretty awesome to use to grate cheese! Fast and easy!

Becky was in charge of cutting up the lettuce. We all had a fun time giving her crap because 1) she didn't know how to cut it up and 2) she wasn't too sure that it was lettuce. I guess most people nowadays just know lettuce that comes pre-cut in bags! Anyhow, it was pretty funny!

Danika then helped brown the hamburger for the tacos.

Separate the dough into 1.5 ounce portions. Form into small balls. Press the dough out with a rolling pin into an oval shape. Turn the dough 45 degrees clockwise and roll some more. Turn 45 degrees once again and roll until round. Heat up a cast iron frying pan or a non-stick pan on medium to medium-high. Place tortilla on hot pan. Watch for air bubbles to form and turn over quickly. Press any large bubbles down. Remove tortilla when slight brown spots begin to form. Place tortilla either in a tortilla warmer or between two paper towels on a plate and seal over the top with tin foil. This will help keep the tortillas warm, soft, and pliable.
Here is a short video showing the process:
It was a fun night. The girls all got to take home 8-10 tortillas and I think everyone enjoyed the evening, along with learning something new!
Monday, October 10, 2011
Prime Rib Chicken Rotini
Last night I was in the mood for something yummy. I had taken some chicken breasts out of the freezer for dinner yesterday, but then we never ate them because we fell asleep mid-afternoon and then just never made dinner. So about 10:30, I decided to make some dinner with them. It was SO good. I was just experimenting, so I didn't take any pictures, but here's the recipe for my Prime Rib Chicken Rotini if you'd like to try it.
Prime Rib Chicken Rotini
4 large boneless, skinless chicken breasts, thawed
My Prime Rib rub mixture
Olive oil
1 can cream of mushroom soup
1 can cream of chicken soup
2 cans mushrooms, undrained
1 box rotini
Start by heating up a dry frying pan. When hot, add about 1/4 c olive oil. Let it get hot. Pat dry any moisture on the chicken breasts. Sprinkle both sides with a nice amount of the prime rib rub and place in the hot oil to brown. Once browned, turn over the chicken and brown the other side. When browned on both sides, remove the chicken from the pan. Pour in the juice and mushrooms from both cans. Deglaze any stuck-on portions of the chicken from the bottom of the pan and swirl into the juice and mushrooms. Add both cans of soup. Stir until well mixed. Add the chicken back to the pan. Cover. Reduce heat to medium and simmer until chicken is cooked and tender. When just about 10 minutes from being done, begin cooking the box of pasta according to package directions. Drain pasta when finished.
You can either serve by plating a chicken breast next to the pasta and then spooning sauce over the pasta or you can slice up the chicken breasts and mix in with the pasta and pour all of the sauce over the chicken and pasta, mixing well. Either way was delicious! It was almost like the poor version of prime rib but with chicken and pasta instead of beef and potatoes! YUM!
Prime Rib Chicken Rotini
4 large boneless, skinless chicken breasts, thawed
My Prime Rib rub mixture
Olive oil
1 can cream of mushroom soup
1 can cream of chicken soup
2 cans mushrooms, undrained
1 box rotini
Start by heating up a dry frying pan. When hot, add about 1/4 c olive oil. Let it get hot. Pat dry any moisture on the chicken breasts. Sprinkle both sides with a nice amount of the prime rib rub and place in the hot oil to brown. Once browned, turn over the chicken and brown the other side. When browned on both sides, remove the chicken from the pan. Pour in the juice and mushrooms from both cans. Deglaze any stuck-on portions of the chicken from the bottom of the pan and swirl into the juice and mushrooms. Add both cans of soup. Stir until well mixed. Add the chicken back to the pan. Cover. Reduce heat to medium and simmer until chicken is cooked and tender. When just about 10 minutes from being done, begin cooking the box of pasta according to package directions. Drain pasta when finished.
You can either serve by plating a chicken breast next to the pasta and then spooning sauce over the pasta or you can slice up the chicken breasts and mix in with the pasta and pour all of the sauce over the chicken and pasta, mixing well. Either way was delicious! It was almost like the poor version of prime rib but with chicken and pasta instead of beef and potatoes! YUM!
Monday, May 9, 2011
Co-Op Pasta
I mentioned about a week ago how I had purchased a vegetable basket from Bountiful Baskets when I ordered my pickling cucumbers. Well, one of the only problems with doing that is that I just don't cook much anymore because of our work schedules. Melon Man doesn't like to eat before he goes to work at night, so I usually just forage for something at home or stop and pick something up on my way - whatever time of the night that may be.
Well, last night I finally got hungry around 10 p.m. since we hadn't made anything for Sunday dinner after church and I knew I had a bunch of veggies and herbs from the co-op basket that needed to get used, so I decided some pasta with veggies and shrimp sounded good. This ended up being a VERY simple (to make and tasting) dish, but it was filling and just comforting food. It probably could be "jazzed" up some with some kind of sauce or such, but I just wanted pasta with butter and salt and pepper with some veggies and shrimp, so this was perfect.
Co-Op Pasta
1 lb spaghetti pasta or other pasta of your choice
2 zucchini, quartered and sliced into slices about 1/4" thick
4 cloves garlic, minced or finely sliced
1 package mushrooms, slicked into slices about 1/4" thick
12-15 leaves of basil, chiffonade style
Salt
Pepper
1 cube Margarine
1 lb shrimp (deveined and de-tailed)
Prepare your pasta in a separate pot according to package directions while you prepare the rest of the recipe. When finished, drain and set aside.


 If using pre-cooked shrimp, saute the veggies until "al dente plus". Okay, so that is my own term (I think). "Al dente plus" is al dente plus just a tiny bit longer to where there is still a little bite but it's starting to head to the softer side. If you like al dente, go for it, but for this, I like al dente plus.
If using uncooked shrimp that still needs to be cooked, throw it in at the early al dente stage. By the time it's cooked, the veggies will be at al dente plus.

Well, last night I finally got hungry around 10 p.m. since we hadn't made anything for Sunday dinner after church and I knew I had a bunch of veggies and herbs from the co-op basket that needed to get used, so I decided some pasta with veggies and shrimp sounded good. This ended up being a VERY simple (to make and tasting) dish, but it was filling and just comforting food. It probably could be "jazzed" up some with some kind of sauce or such, but I just wanted pasta with butter and salt and pepper with some veggies and shrimp, so this was perfect.
Co-Op Pasta
1 lb spaghetti pasta or other pasta of your choice
2 zucchini, quartered and sliced into slices about 1/4" thick
4 cloves garlic, minced or finely sliced
1 package mushrooms, slicked into slices about 1/4" thick
12-15 leaves of basil, chiffonade style
Salt
Pepper
1 cube Margarine
1 lb shrimp (deveined and de-tailed)
Prepare your pasta in a separate pot according to package directions while you prepare the rest of the recipe. When finished, drain and set aside.

Don't know how to chiffonade basil? Quick instructions via pictures (courtesy teenytinyturkey on Flickr)...


In a large, deep saute pan, melt the margarine. Add in the zucchini, garlic, mushrooms, basil, and salt and pepper (I prefer the "restaurant grind" of pepper and kosher salt). 


If using uncooked shrimp that still needs to be cooked, throw it in at the early al dente stage. By the time it's cooked, the veggies will be at al dente plus.

Remove the pan from the heat so the shrimp stops cooking (or it will be come rubbery) and dump in your drained pasta.

Then, using tongs, toss the veggies and shrimp with the pasta until everything is well coated in the buttery goodness. Taste and season with additional salt and pepper as necessary and voila! You're done! Eat and enjoy. Yum!

Saturday, April 30, 2011
Jewish Half Sour Pickles
I got my weekly Bountiful Baskets email earlier this week and decided to participate - they had pickling cucumbers and I was craving Chompies half-sours! So...I did. I got a lot of really good stuff this week. Lots of good herbs, fruit, veggies, yummy goodness!


While you’re gathering and measuring and grinding and chopping all the goodness that goes into making these, let your cukes soak in a sink full of ice cold water. And be sure to snip off any little stem parts that are still attached (both ends). The stems are very bitter and can ruin an otherwise great batch of pickles.
Gather up all the ingredients you'll need...
2/3 tsp. whole coriander seeds
2/3 tsp. brown mustard seeds
4 whole allspice
2/3 tsp. crushed red pepper flakes
2/3 tsp. black pepper corns
1/2 tsp. dill seeds
3-4 Tbsp. dill weed
5-6 pieces broken dried bay leaf
8-12 cloves garlic
1/3 cup pickling salt
8 cups water
8-10 pickling cukes

The amount of salt, and the other ingredients, will, of course, depend on the size of your pickle jar. So all my measurements are based on my jar. You’ll need to adjust based on your jar. I used a 1/2 gallon PETE container.
Add the salt to the water and let it dissolve. Set it aside.
Grind up the dry ingredients, but don’t turn it to dust. You just want to release some of the flavors. I used a pepper grinder on coarse grind and it worked great.

 The salt and garlic will be providing most of the noticeable flavor for your pickles, so getting the garlic quantity right is a critical step. Keep in mind that smaller cloves are often more strongly flavored than large ones. If your garlic cloves are the size of your thumb, use 10-12.

 When you pack your cukes into your jar, try to leave an inch or two of headroom above the pickles. If the pickles are not completely covered in the brine, they’ll just rot, so push and shove a little to get them in with some room to spare.
In the [blurry] pictures below, I made two batches, one in a bowl and the other in a PETE container. One, I poured the seasonings in the water, the other just on top of the cukes before pouring in the water. I'm sure you catch my drift...


Now they get to sit. Do not tighten the lid while the pickles are sitting. You want the natural airborne beasties to get into the jar and help the pickles start to ferment. Leave them at room temperature for at least 24 – 48 hours – and then screw that cap on tight and put them in the refrigerator. Oh, and be sure to put a little dish under the jar while fermenting. Some of the brine is guaranteed to spill out as the fermentation gets going; catching it in the dish is better than wiping it off the table!

I was up and out the door by 6:45 and on my way to go get my veggie basket and my crate of cukes...all 36 pounds of them!

After dropping off the goods at home, Melon Man and I ran some errands and grabbed some breakfast grub. Then we headed home. I was excited to get going on my pickles. As I working on the pickles, I kept thinking about my mom and how today is the sixth anniversary of her death. She loved pickles. I used to help her make pickles in the summer. So, today, this was the perfect activity to remember her by.
Here is how I made them....(I found the recipe online but I don't remember where now to give credit where credit is due!)
While you’re gathering and measuring and grinding and chopping all the goodness that goes into making these, let your cukes soak in a sink full of ice cold water. And be sure to snip off any little stem parts that are still attached (both ends). The stems are very bitter and can ruin an otherwise great batch of pickles.

Gather up all the ingredients you'll need...
2/3 tsp. whole coriander seeds
2/3 tsp. brown mustard seeds
4 whole allspice
2/3 tsp. crushed red pepper flakes
2/3 tsp. black pepper corns
1/2 tsp. dill seeds
3-4 Tbsp. dill weed
5-6 pieces broken dried bay leaf
8-12 cloves garlic
1/3 cup pickling salt
8 cups water
8-10 pickling cukes

The amount of salt, and the other ingredients, will, of course, depend on the size of your pickle jar. So all my measurements are based on my jar. You’ll need to adjust based on your jar. I used a 1/2 gallon PETE container.
Add the salt to the water and let it dissolve. Set it aside.
Grind up the dry ingredients, but don’t turn it to dust. You just want to release some of the flavors. I used a pepper grinder on coarse grind and it worked great.

Then, I poured it all into the water.


In the [blurry] pictures below, I made two batches, one in a bowl and the other in a PETE container. One, I poured the seasonings in the water, the other just on top of the cukes before pouring in the water. I'm sure you catch my drift...


When the pickles are packed, pour in the seasonings, the chopped garlic, the dill weed, the bay leaf, and anything else you decided not to grind earlier. Then fill the jar with the salt water, right up to the top.
Now they get to sit. Do not tighten the lid while the pickles are sitting. You want the natural airborne beasties to get into the jar and help the pickles start to ferment. Leave them at room temperature for at least 24 – 48 hours – and then screw that cap on tight and put them in the refrigerator. Oh, and be sure to put a little dish under the jar while fermenting. Some of the brine is guaranteed to spill out as the fermentation gets going; catching it in the dish is better than wiping it off the table!
Subscribe to:
Posts (Atom)